SIRENIA
Tutorial I
Part I - Getting started
Table of Contents
This tutorial will guide you through a few automation examples and teach you about the concepts involved in our automation solution.
Prerequisites
You need the following items in place in order to get started developing flows and setting up automation for your applications.
- Basic understanding of Javascript - this introduction is recommended but there are plenty others to find on the interwebs.
- A couple of sample applications - we’ll be using this simple java application and a Chrome browser (make sure to install this extension).
- Access to Cuesta (the configuration interface) - you’ll most likely have a local installation you can use.
- A Manatee (driver platform) installed - you’ll most likely have been provided an installation you can use.
Concepts and software components
There are a lot of moving parts in the Sirenia solution, some run on your local desktop and some are server-based. We’ve done a lot of work to make sure the use of the software is as simple as possible, but if you’re going to be creating new flows and otherwise configure the system it definitely helps to have a basic understanding of the individual elements involved.
The table below describes software components and some common terms you’ll encounter in this tutorial.
| Name | Description |
|---|---|
| Manatee | aka the Driver Platform. This is the application which runs on your desktop executing flows. |
| Kwanza | aka the Context Management Registry aka CMR. This is the database in which flows etc are stored. |
| Cuesta | aka the Configuration Interface. This is the web-app which is used to write flows etc |
| flow | A flow is a set of instructions to Manatee. It can involve interacting with a specific application. |
| field | A UI element which can be interacted with in a flow. E.g. a button that can be clicked. |
| context menu | We provide a context menu for connected applications - use it to execute flows etc |
| session | A group of applications connected to Manatee (there can only be one of each type in a session) |
Connecting the first application
The first thing to do when connecting a new application is to create it in Cuesta. Do this by;
- Open Cuesta and choose Apps, then click the “+” icon to create a new app.
- Enter details for app.
Specifically the Type should be
Java AWTand the Title bar contains should beTextInputDemo. This tells the Manatee how to recognize the application (window). - Add it to the PRODUCTION group (or any other group that your Manatee is configured to be part of).
- Add it to any other group you are also a menber of. You can also add your username myuser.
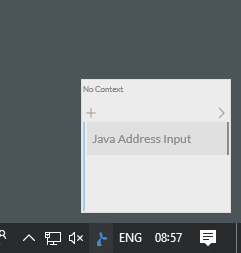
Now, make sure that your Manatee is running (check for the mermaid icon in the notification area of your task bar). Left-click the icon and verify that the Java Address Input application is listed.
Try starting the java application (i.e. double-click the TextInputDemo.jar file) - Manatee should detect the app and its window withing a few seconds and decorate the window with a coloured triangle as well as list the application with a green background in the notification area popup.
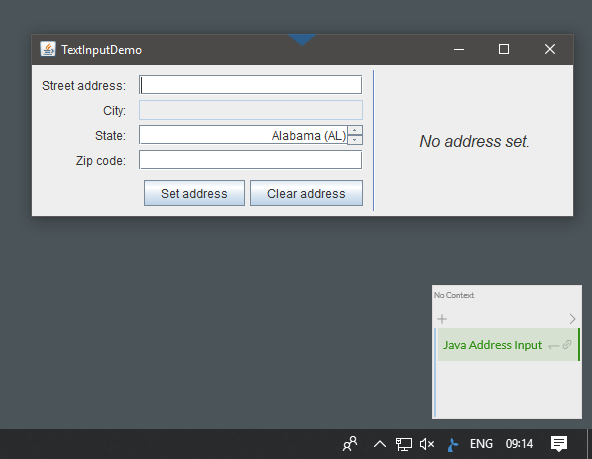
You now have your first application connected to the Manatee.
Next, we’ll setup a simple flow to automatically input some text in the application.
Writing a simple automation flow
The Java Address Input application is really simple, but we’re going to create a flow to input some default strings into the text fields present in the app.
First, we need to define the actual fields themselves in Cuesta. A field consists of a name and a path. The path is a string which instructs Manatee where to find the field in the internal structure of the application. It can be difficult to find fields in some instances, but Cuesta and Manatee has an built-in functionality to ease the defintion for simple fields.
- In Cuesta on the page for the
Java Address Inputapp, select Fields and create a new. - Name the field
Address. - Use the built-in field-path-detector to start detecting fields and click on the field in the app (a red square should follow the mouse to indicate where fields are detected).
- Repeat steps 1-3 for the
CityandStatefields.
The flow which will do the actual filling is listed below:
Fields["Address"].input('Fifth Avenue');
Fields["City"].input('New York');
// Here we match using a regular expression - the content in the spinner is actually 'New York (NY)'
Fields["State"].select('New York.*');
Go to the flow tab and create a new flow. Name it something memorable and add the same groups as you used for the application itself. The flow type should be action, and the rest of the fields are optional.
Note that the fields are accessed by indexing the Fields structure. If the name of the field is a valid Javascript variable name they can also be accessed as:
Fields.Address.input('...');
// or simply
Address.input('...');
The input method used to enter text into the Address and City fields will simply put the string given into the field. The select method can be used on comboboxes, lists, treeviews, tables etc to select an item.
Make sure the flow is saved - and try it out by holding the Alt key down and right-clicking anywhere in the (running and connected) Java Address Input app. You should see a context-menu containing the flow you’ve just created. Click on it and watch while the text fields are filled out.